






Replace a failed disk in Linux software RAID (mdadm)
A disk in your server's mdadm RAID failed? Confirm it, note the serial, remove it from the array, have it replaced, then rebuild the mirror and the boot loader.
- Advanced
- 40 min read
- Updated
On this page
Most dedicated servers with two disks run Linux software RAID 1: both disks hold the same data. When one fails, the server keeps working on the other, and the array is degraded. This guide takes you from the warning to a healthy mirror again. For the day-one checks of your RAID and disks, see dedicated servers.
Before you start
- Root access over SSH, and the server's IPMI console if your server has one (IPMI console and virtual media).
- A current backup. During a degraded state and the rebuild, your data exists only once; see backup strategy.
- In the examples the healthy disk is
/dev/sda, the failed one/dev/sdb, and the arrays are/dev/md0(partitions 1) and/dev/md1(partitions 2). Use the names from your own output.
Step 1: Confirm which disk failed
cat /proc/mdstat
sudo mdadm --detail /dev/md0
In /proc/mdstat, a healthy RAID 1 shows [UU]; a degraded one shows [U_] or [_U], and a failed member is marked (F). mdadm --detail shows State : clean, degraded and lists the faulty or removed device.
Note the serial number of the failed disk, so the right disk is replaced:
lsblk -o NAME,SIZE,MODEL,SERIAL
sudo smartctl -i /dev/sdb
If the failed disk no longer answers, note the serial of the healthy disk instead and say so in the ticket.
Step 2: Remove the failed disk from every array
A disk usually has a partition in each array. Mark each one as failed and remove it:
sudo mdadm /dev/md0 --fail /dev/sdb1 --remove /dev/sdb1
sudo mdadm /dev/md1 --fail /dev/sdb2 --remove /dev/sdb2
Verify: cat /proc/mdstat lists only sda partitions in each array.
Step 3: Ask us to replace the disk
Open a ticket under Support › Tickets › Open Ticket, choose the dedicated server as Related Service, and write:
- that a RAID member failed and has been removed from the arrays;
- the serial number (and model) of the failed disk, or of the healthy disk to keep;
- the output of
cat /proc/mdstat; - when a replacement suits you.
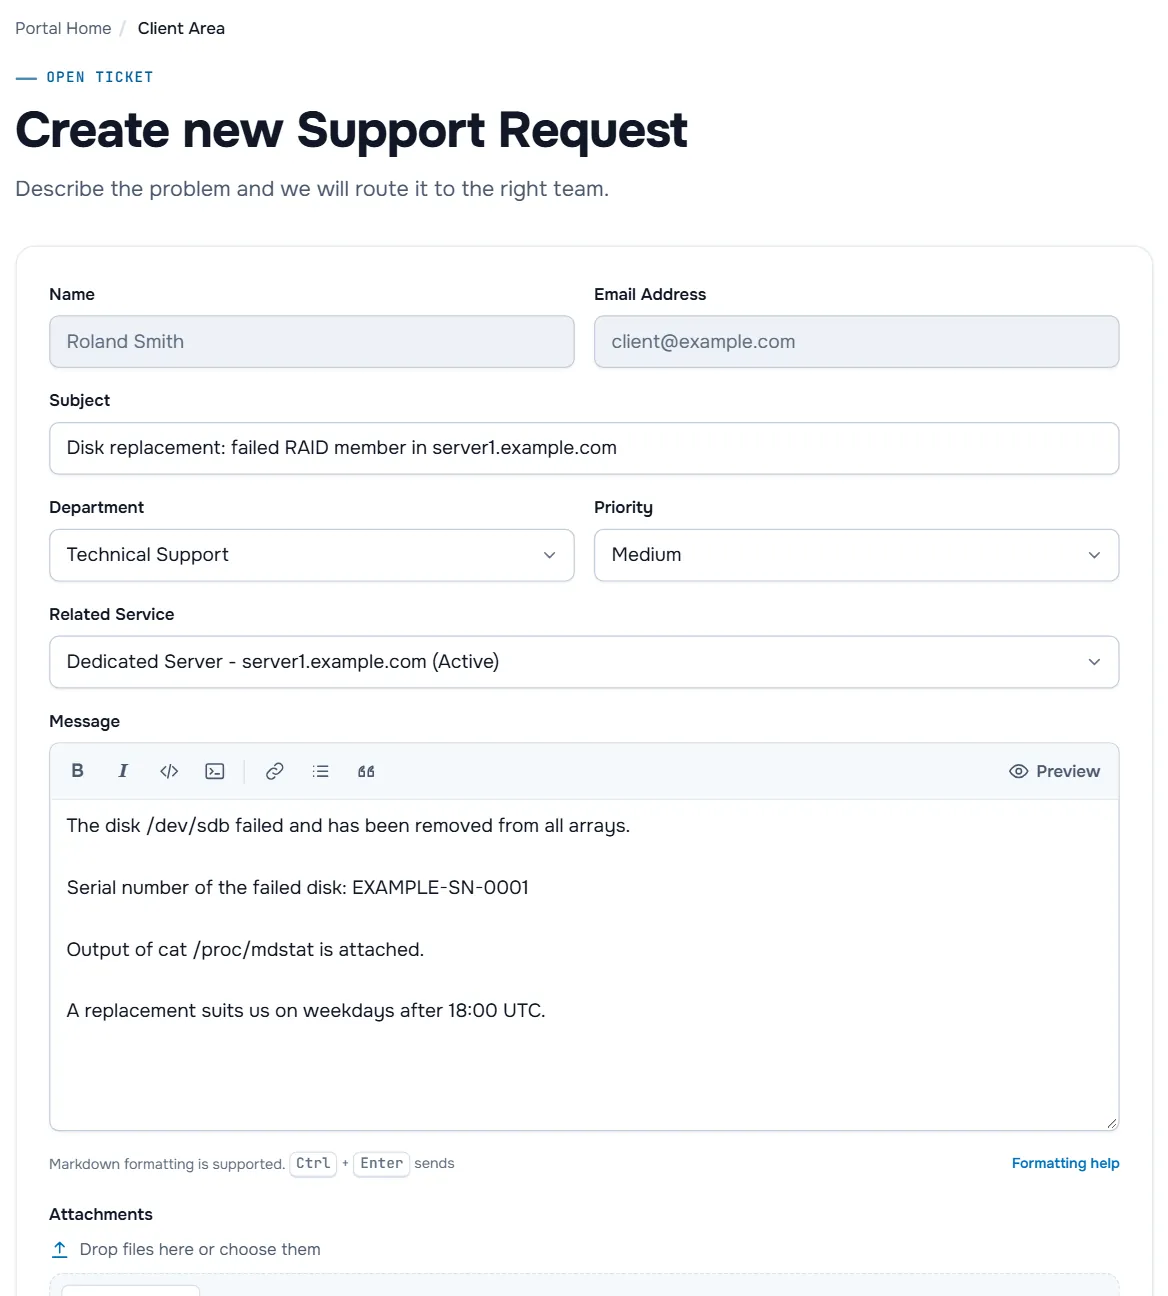
We confirm the time and the procedure with you; see open a support ticket.
Step 4: Copy the partition layout to the new disk
After the replacement, find the new, empty disk with lsblk (no partitions, same size or larger). Check the partition table type of the healthy disk:
sudo fdisk -l /dev/sda | grep -i "disklabel type"GPT
Copy the table from sda to sdb, then give the copy its own unique GUIDs:
sudo sgdisk -R /dev/sdb /dev/sda
sudo sgdisk -G /dev/sdb
MBR (dos)
sudo sfdisk -d /dev/sda | sudo sfdisk /dev/sdbVerify: lsblk shows the same partitions on sdb as on sda.
Step 5: Add the new partitions and let the arrays rebuild
sudo mdadm /dev/md0 --add /dev/sdb1
sudo mdadm /dev/md1 --add /dev/sdb2
watch cat /proc/mdstat
/proc/mdstat shows recovery with a progress bar and an estimated finish. Leave watch with Ctrl + C; the rebuild continues in the background.
Verify: when the rebuild is done, every array shows [UU] and mdadm --detail reports State : clean.
Step 6: Make the new disk bootable
The boot loader lives outside the arrays, so put it on the new disk too:
BIOS (legacy) boot
sudo grub-install /dev/sdbUEFI boot
If /sys/firmware/efi exists, the server boots with UEFI. The EFI system partition is not part of the RAID; copy it from the healthy disk to the empty partition created in Step 4 (here partition 1 is the EFI partition; check with lsblk -o NAME,PARTTYPENAME):
sudo dd if=/dev/sda1 of=/dev/sdb1 bs=1MTroubleshooting
mdadm: cannot find /dev/sdb1: No such file or directory when removing. The failed disk has vanished from the system. Remove the missing member with sudo mdadm /dev/md0 --remove detached (or failed), then continue.
The rebuild is very slow. Rebuilds share the disks with normal traffic. Avoid heavy disk work until it finishes.
The server does not boot after the replacement. The boot loader is missing on the disk the firmware tries first. Use the IPMI console to choose the other disk, then complete Step 6.
A second disk reports errors during the rebuild. Stop and open a ticket immediately with cat /proc/mdstat, mdadm --detail and dmesg output; do not force anything before your data is safe.
Next steps
- Check disk health regularly with
smartctl -Hon each disk; see dedicated servers. - Keep restores possible: backup strategy.
Frequently asked questions
Is my data lost when one disk of a RAID 1 fails?
No. A RAID 1 mirror keeps a full copy on the other disk, so the server keeps running. Until the rebuild is finished, though, there is no second copy: make sure your backups are current.
Can the disk be replaced while the server runs?
That depends on the server's hardware. Tell us the serial number of the failed disk in your ticket and we confirm the time of the replacement with you, including whether the server must be switched off.
How long does a rebuild take?
It depends on the disk size and how busy the server is. /proc/mdstat shows the progress and an estimated finish time.
Does this apply to hardware RAID controllers?
No. This guide covers Linux software RAID managed with mdadm. Hardware RAID controllers have their own tools; open a ticket with the controller's status output.