






Extend drive C: or add a new disk on Windows Server
Use new disk space on Windows Server: extend C: with Disk Management or PowerShell, remove a recovery partition that blocks Extend Volume, or add a new disk.
- Intermediate
- 15 min read
- Updated
On this page
More disk space on a Windows VPS or VDS arrives as raw storage: either as unallocated space at the end of the existing disk, or as a new disk. Windows does not add it to drive C: on its own. This guide covers both cases on Windows Server 2016 to 2025, including the recovery partition that often blocks Extend Volume.
Before you start
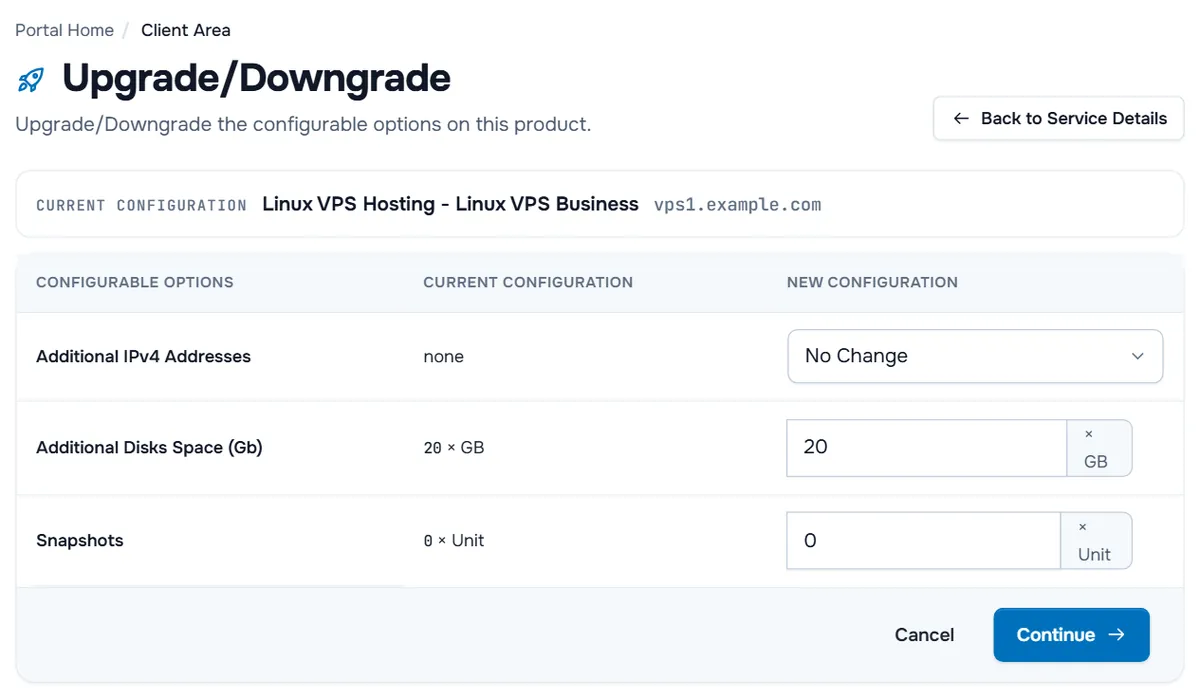
- Order the space: open the server under Services › My Services, then Actions › Upgrade/Downgrade Options for extra disk space or Upgrade/Downgrade for a bigger plan; see upgrade or downgrade a service.
- Take a snapshot or a backup. Windows VPS plans include free snapshots; take one before you change partitions.
- Sign in over Remote Desktop with an administrator account; see first steps on a Windows server.
Step 1: See where the new space is
Open an elevated PowerShell (right-click Start, then Terminal (Admin) or Windows PowerShell (Admin)) and list the disks and partitions:
Get-Disk
Get-Partition -DiskNumber 0
Or open Disk Management (diskmgmt.msc) and choose Action › Rescan Disks. You will see one of three layouts:
- Unallocated space directly to the right of C: follow Case A.
- A recovery partition between C: and the unallocated space: follow Case B.
- A new disk marked Not Initialized or Offline: follow Case C.
Case A: extend C: into the space next to it
In Disk Management, right-click C:, choose Extend Volume, keep Maximum available and finish the wizard. Or in PowerShell:
$size = Get-PartitionSupportedSize -DriveLetter C
Resize-Partition -DriveLetter C -Size $size.SizeMax
Verify: Get-Volume -DriveLetter C shows the new size, and File Explorer lists the larger C:.
Case B: a recovery partition blocks Extend Volume
Windows can only extend a volume into unallocated space immediately after it. A small recovery partition behind C: stops that. The fix moves Windows RE onto C:, removes the partition and then extends C:.
- In an elevated Command Prompt or PowerShell, check and disable Windows RE. When it is disabled, its image is kept in
C:\Windows\System32\Recovery:
reagentc /info
reagentc /disable- Start
diskpart, find the recovery partition and delete it:
diskpart
list disk
select disk 0
list part
select part 4
delete partition override
exit
Replace 4 with the number of the partition of type Recovery that sits after C: in your list part output.
Extend C: as in Case A.
Enable Windows RE again. Without a recovery partition, it uses the image on C:
reagentc /enable
reagentc /info
Verify: reagentc /info shows Windows RE status: Enabled, and C: has the new size.
Case C: bring a new disk online
A new disk is empty and may be offline. Find its number (here 1), bring it online if needed, initialise it with GPT, create one partition and format it with NTFS:
Get-Disk
Set-Disk -Number 1 -IsOffline $false
Initialize-Disk -Number 1 -PartitionStyle GPT
New-Partition -DiskNumber 1 -UseMaximumSize -AssignDriveLetter | Format-Volume -FileSystem NTFS -NewFileSystemLabel "Data"
Skip Set-Disk if the disk is already online. In Disk Management the same steps are: right-click the disk, Online, Initialize Disk (GPT), then right-click the unallocated space and New Simple Volume.
Verify: Get-Volume lists the new drive letter with the label Data, and you can create a folder on it.
Troubleshooting
Get-PartitionSupportedSize shows the same maximum as the current size. The unallocated space is not directly after C: (see Case B), or Windows has not seen the new size yet: run Rescan Disks in Disk Management.
delete partition stops with "Cannot delete a protected partition without the force protected parameter set". That is expected for a recovery partition, which is why the command above adds override. Never use override on any other partition: the EFI system partition and C: itself are needed to boot.
reagentc /enable reports an error. Check that C:\Windows\System32\Recovery\Winre.wim exists. If it does not, Windows RE cannot be enabled from C:; the server still runs normally, and you can restore from your snapshot if you need Windows RE.
The new disk does not appear at all. Choose Action › Rescan Disks; if it is still missing, open a ticket with the output of Get-Disk.
Next steps
- Keep Windows up to date after the change: fix Windows Update problems.
- Linux servers: use new disk space on a Linux server.
Frequently asked questions
Why is Extend Volume greyed out?
Windows can only extend a volume into unallocated space directly to its right on the same disk. On many images a small recovery partition sits between C: and the new space; this guide shows how to deal with it.
Do I need to restart?
No. Extending NTFS volumes and bringing new disks online works while Windows runs. If Disk Management does not show the new space, choose Action › Rescan Disks first.
Is it safe to delete the recovery partition?
It holds Windows RE, the recovery environment. When you disable Windows RE first, Windows copies its image to the system drive, and enabling it again afterwards keeps recovery working from C:. Take a snapshot or backup before you change partitions.
Can I shrink C: again later?
Shrinking a volume is possible inside Windows, but the server's disk itself cannot be made smaller. Moving to a plan with a smaller disk means backing up, ordering the smaller plan and restoring.