






Add an additional IPv4 address on Windows Server
Add an extra IPv4 address to a Windows server with PowerShell or the adapter settings, keep outgoing traffic on the main address and bind sites to it.
- Intermediate
- 10 min read
- Updated
On this page
Additional IPv4 addresses let a Windows server run several TLS sites on their own addresses, separate services or send mail from a dedicated address. Once ordered, the addresses are routed to your server; Windows starts answering on them when you add them to the network adapter.
Before you start
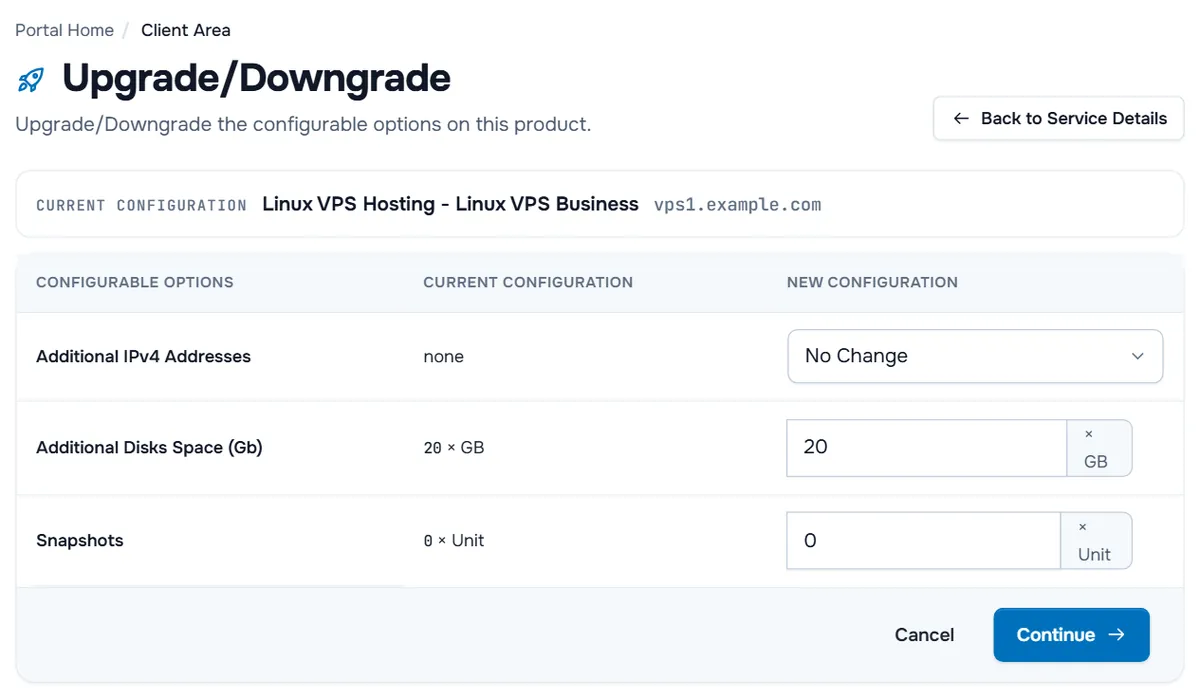
- Order the addresses: under Services › My Services, Manage next to the server, Actions › Upgrade/Downgrade Options, then Additional IPv4 Addresses where your plan offers it; see upgrade or downgrade a service.
- Note the details of the new addresses from your service page or the email we send: each address and its prefix length (for example
/24). - Sign in over Remote Desktop as administrator. Take a snapshot first if your plan has them, and know how to reach the server's console if a change cuts your connection.
In the examples the main address is 203.0.113.10/24, the gateway 203.0.113.1, the new address 203.0.113.11/24 and the adapter is called Ethernet.
Step 1: Check the current configuration
Open PowerShell as administrator:
Get-NetIPConfiguration
Get-NetIPInterface -AddressFamily IPv4 | Format-Table InterfaceAlias, Dhcp, ConnectionState
Note the InterfaceAlias of the connected adapter. If Dhcp shows Enabled for it, do Step 2 first; if it shows Disabled, go to Step 3.
Step 2: Make the main address static (only if DHCP is on)
Adding a static address to an interface that uses DHCP turns DHCP off, so set the main address statically first, with the details from your service page. Use the adapter settings, where you can enter everything at once:
- Run
ncpa.cpl, right-click the adapter and choose Properties. - Select Internet Protocol Version 4 (TCP/IPv4) and Properties.
- Choose Use the following IP address and enter the main address, the subnet mask (
255.255.255.0for/24) and the default gateway, plus DNS servers under Use the following DNS server addresses. - Select OK. Your Remote Desktop session may pause for a moment.
Verify: Get-NetIPInterface -InterfaceAlias "Ethernet" -AddressFamily IPv4 shows Dhcp: Disabled, and you can still reach the server.
Step 3: Add the new address
New-NetIPAddress -InterfaceAlias "Ethernet" -IPAddress 203.0.113.11 -PrefixLength 24 -SkipAsSource $trueDo not pass -DefaultGateway here: the adapter already has its gateway. -SkipAsSource $true keeps outgoing connections on the main address and stops Windows from registering the new address in DNS.
You can do the same in the adapter settings: Internet Protocol Version 4 (TCP/IPv4) › Properties › Advanced… › IP Settings › Add… under IP addresses. Addresses added there can become a source address for outgoing traffic.
Verify:
Get-NetIPAddress -InterfaceAlias "Ethernet" -AddressFamily IPv4 | Format-Table IPAddress, PrefixLength, SkipAsSourceThen, from your own computer, ping 203.0.113.11 gets replies (Windows answers ping only if your firewall allows ICMP echo; test a listening service otherwise).
Step 4: Use the address
- Websites in IIS: edit the site's bindings and choose the new address under IP address instead of All Unassigned; see host a website on IIS with HTTPS.
- Other services: most server software has a listen or bind address setting.
- Firewall: Windows Defender Firewall rules without a local address apply to all addresses on the server; see Windows Firewall.
- Reverse DNS: set a PTR record for the new address if a mail server uses it; see reverse DNS (PTR).
To remove the address again:
Remove-NetIPAddress -IPAddress 203.0.113.11 -Confirm:$falseTroubleshooting
New-NetIPAddress : Instance MSFT_NetIPAddress already exists. The address is already on the adapter. Check Get-NetIPAddress.
Instance DefaultGateway already exists. You passed -DefaultGateway again. Run the command from Step 3 without it.
The connection dropped after the change and the server is unreachable. The main address was DHCP-based and DHCP was turned off. Open the console and set the main address statically as in Step 2, or roll back to your snapshot.
The new address answers on the server but not from outside. It is not routed to this server yet or the firewall blocks it. Compare with the details we sent; if they match, open a ticket with the output of Get-NetIPAddress.
Next steps
- Linux servers: add an additional IPv4 address on Linux.
- Publish a site on the new address: host a website on IIS with HTTPS.
Frequently asked questions
Why use SkipAsSource?
With SkipAsSource set to true, Windows does not use the added address for outgoing connections or register it in DNS. Outgoing traffic keeps using the main address, which keeps allow lists and mail reputation unchanged.
Do I need to restart Windows?
No. The address works as soon as it is added, and it stays after a restart.
Can I give the new address its own reverse DNS?
Yes. Every IPv4 address has its own PTR record; see our reverse DNS guide.
My adapter uses DHCP. Can I still add an address?
Yes, but switch the main address to a static configuration first. Adding a static address to an interface that uses DHCP turns DHCP off for it.